A New Term: Setting up for Success
 It’s week two of the semester. Syllabus week has come and gone, and all of a sudden, there’s actual work to do — crazy, right?
You might be feeling overwhelmed looking at all those course outlines and Brightspace weekly modules. If you are, I’m here to help.
When it comes to school commitments, I’m the type of person who needs to write deadlines down multiple times, in multiple places, in order to wrap my head around how and when I’m going to meet those deadlines.
I need to see things visually, and have easy accessibility — ESPECIALLY during online learning.
You might read this and think my planning is excessive, but perhaps this is my “University life hack” for scoring As. Most of all, this is my guide to staying organized throughout the entire term. A little setting up at the beginning can go a long way for the rest of the semester.
So, here’s what I do to get set up for the new term.
Step 1: Paper Planner/Calendar
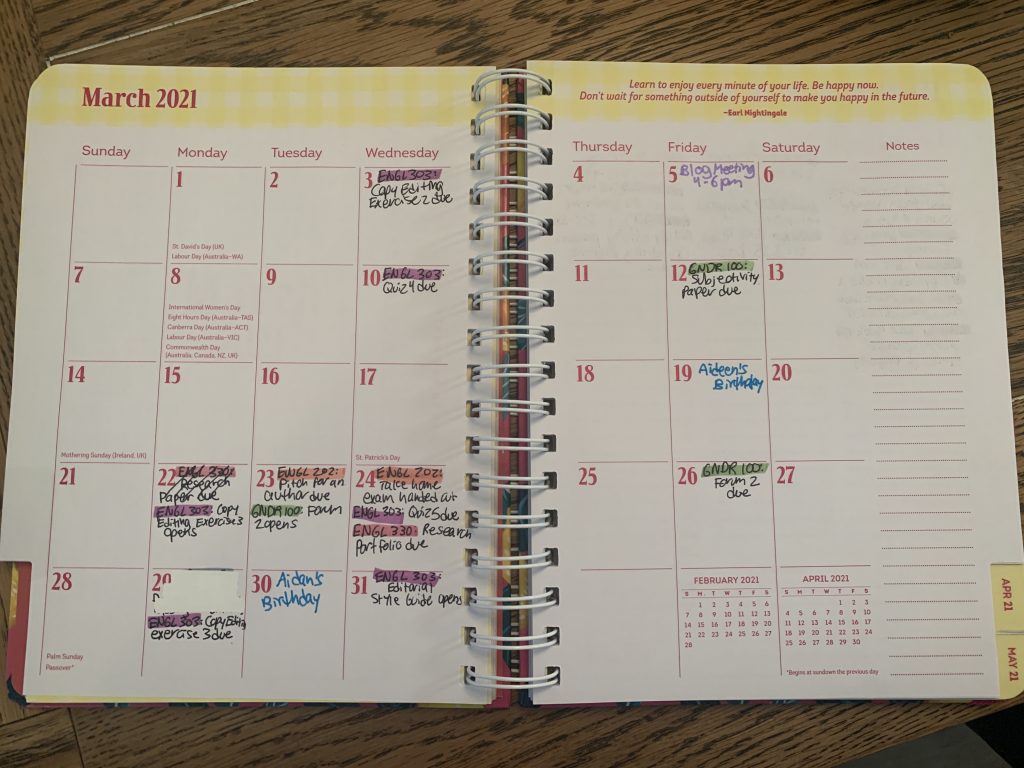
Month View
I pull out my course outline and/or syllabus for each class and write down all deadlines – dates for major assignments, discussion forums, quizzes, midterms, exams, etc. – onto the month view in the planner.
Then I go a bit more in detail, by moving to the week view, and writing out the topic or unit of each week, as well as repeating those assignment deadlines.
If a course outline lists the readings that will be due on each class date, I write those in also.
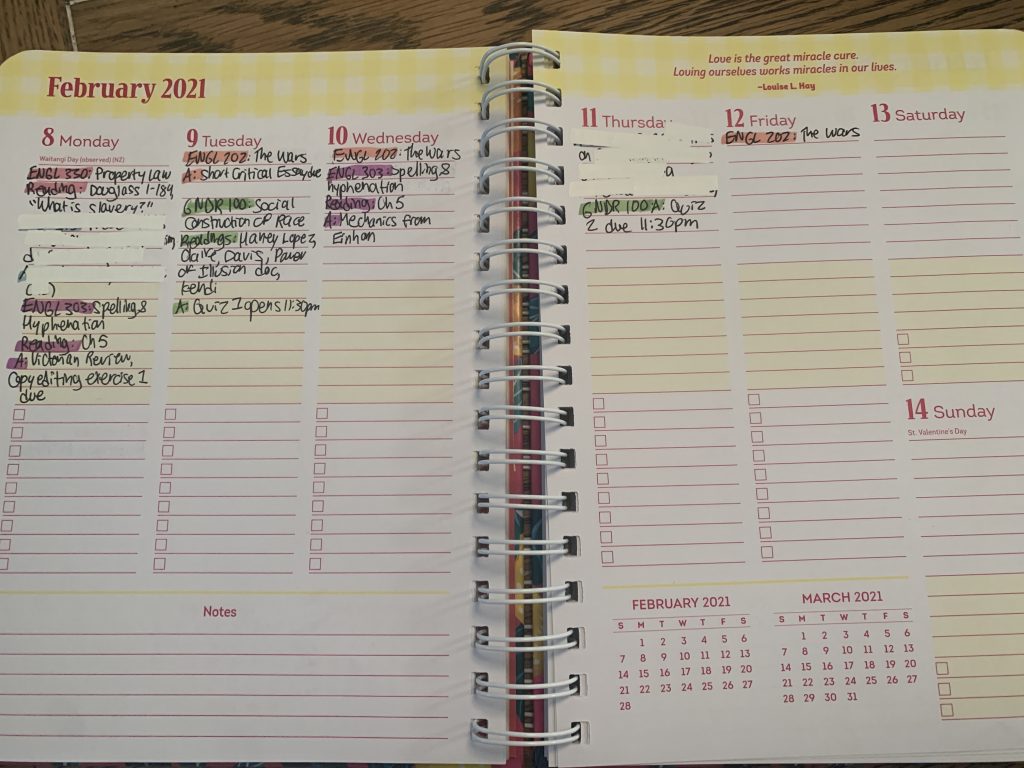
Week View
Step 2: Phone or Digital Calendar
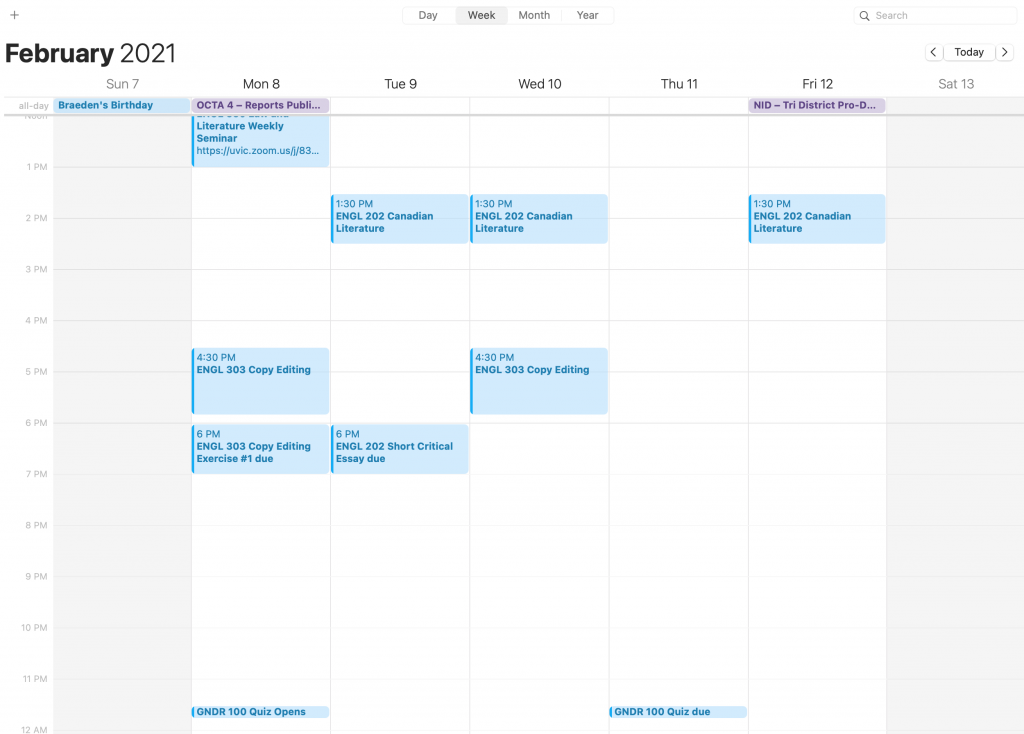
Digital Calendar
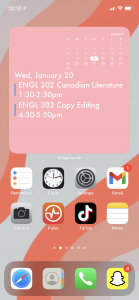
Calendar Widget
To further cement those deadlines in my brain and put them in a spot where I can pull them up virtually anytime, I copy them into my iPhone’s calendar app.
I also input the times of my class meetings on Zoom to ensure I never miss them. I have this calendar synced by iCloud with my computer as well, so the same deadlines will appear on both of my devices.
Google calendar is also a great calendar platform which has tons of customization features.
Additional tip: If you have an iPhone and are able to add a calendar widget, your deadlines and class times can be displayed for even easier access.
Step 3: Microsoft Excel/Google Sheets Spreadsheet
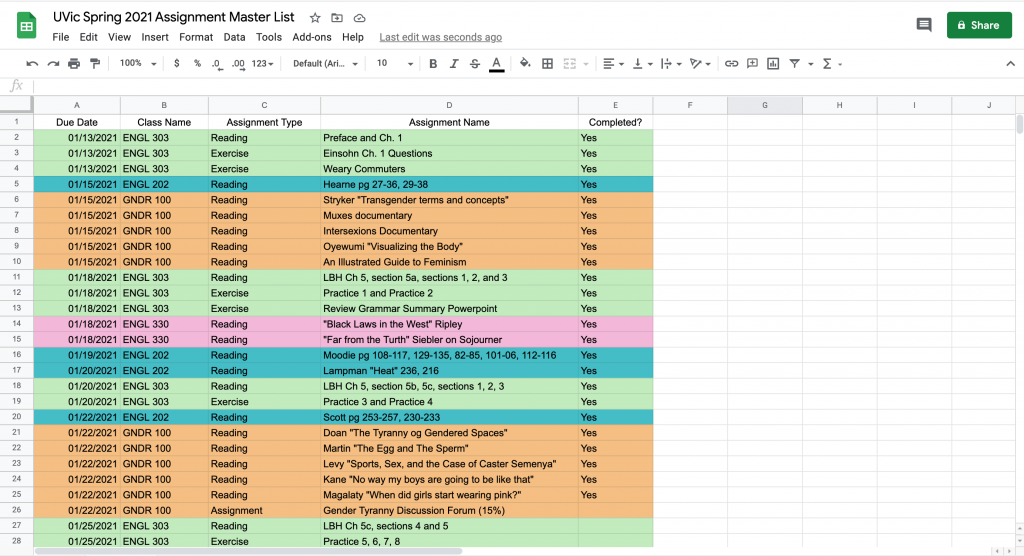
Assignment Master List
Essentially, this is a giant checklist of all important readings, assignments, and tests. First I type out all of these commitments with their due dates class by class, leaving a space at the end to input whether or not I have completed it.
I highlight each class in a different colour, and then sort the entire sheet by date, which puts the assignments in order of when they’re due.
Step 4: UVic Four-Month Calendar
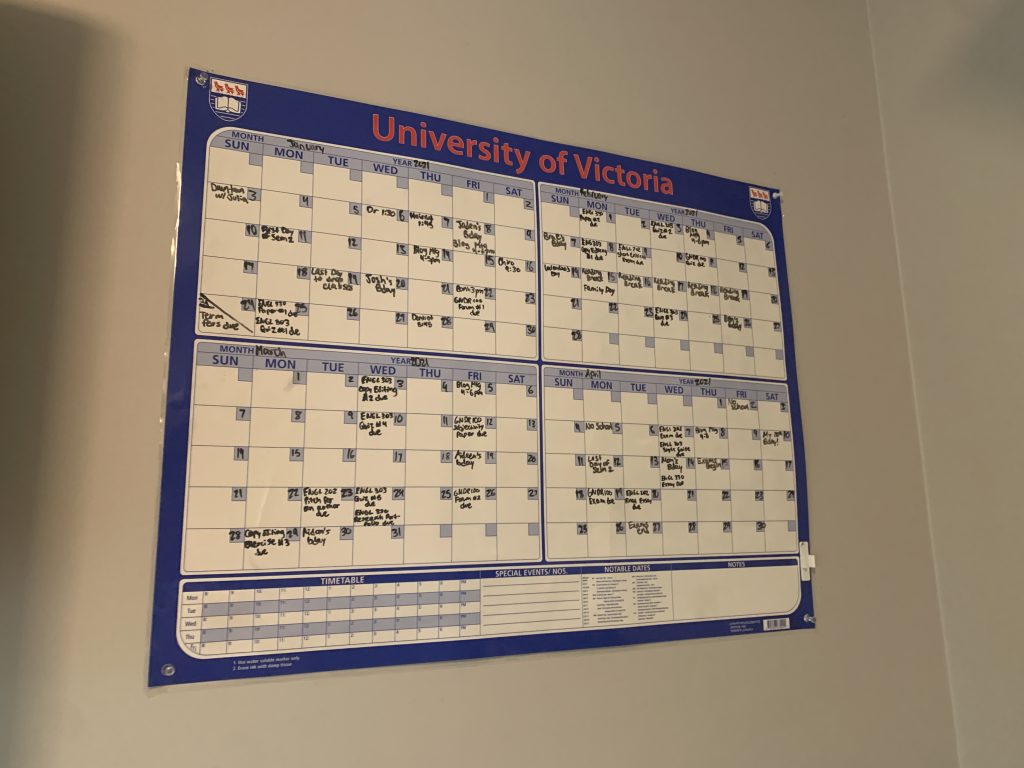
UVic Four Month Calendar
So I can really visualize what the semester as a whole will look like, I write all the most important deadlines onto my UVic four-month dry erase calendar from the UVic bookstore.
I hang this above my desk, so it’s easy to see all of the assignments at once with a quick glance. This is especially helpful in figuring out which days are the best to schedule appointments, birthday celebrations, and other non-school related commitments.
Step 5: To-Do List sticky notes
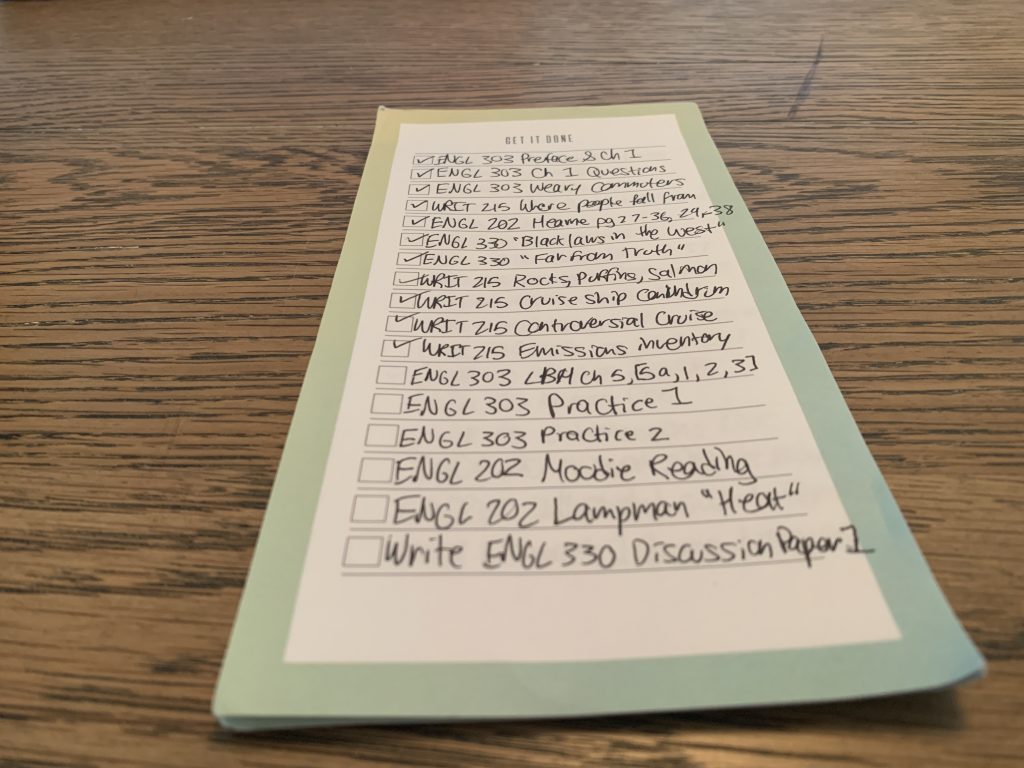
To-Do List Sticky Note Pad
This step is ongoing throughout the semester, because I find that there’s something so satisfying in checking off a task on paper once it’s completed.
This is great for breaking up school tasks. For example, instead of just writing “essay” on my checklist, I can split the task up into brainstorming, writing, revising, and submitting so I feel like I’m accomplishing more at each step.
I also love using these checklists to include non-school related tasks, such as doing laundry or paying my car insurance. I would truly be a mess without this holy grail of a checklist.