
Blueprint’s Word Origin and What It’s Got to Do With My Photography Project
As part of my major (Visual Arts and Computer Science), I have to take four second-year art courses, and this fall, I took ART241 – Photography. It’s basically the first second-year photography course you have the option to take.
Throughout the semester, we explored different methods of creating/altering photos, and one of the methods we tried was call cyanotype. I didn’t have a single clue what cyanotype even meant before this class. Don’t worry if you haven’t heard of it either because I’ll be talking about it in a bit.
For our very last class project, we had to choose one of the methods we had looked at over the course, further explore it, and create a 3-image series using that method, and, of course, I chose cyanotype.
But before I walk you through what I did for my project, I want to talk about what cyanotype even is. And in order to understand what cyanotype is, we need to talk about blueprints and where they came from. And before we even talk about that, I want to very quickly explain what a negative/positive means in photography. They’re all relevant, I promise!
Negative/Positive
Nothing complicated, it’s very straightforward:
If you alter a photo so that the light areas in the original photo become dark and vice versa, that’s called a negative. Here is an example:
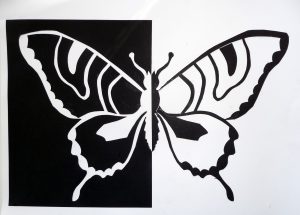
Source: http://raeldredge.com/art-by-ra-eldredge/teaching-demonstration-art-by-ra-eldredge/positive-negative-art/
The left side is a negative and the right side is a positive.
Blueprint
You’re probably familiar with the word “blueprint” meaning a plan or a model for something. Now, I don’t know about you, but whenever I hear the word “blueprint”, this image instantly pops up in my brain:
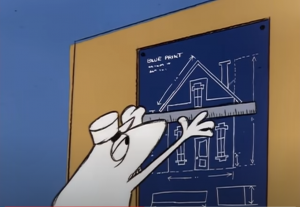
from YouTube video: https://www.youtube.com/watch?v=umM9Ls0SaiU&t=187s
[Off-topic note: Please leave a comment below if you recognize this cartoon and/or this specific episode! I’m actually really curious to see how many people know it. Alright, getting back on topic! ]
It all started back in early 1840s when Sir John Herschel, a mathematician, astronomer, chemist, inventor, photographer (basically a super smart, polymath, you get it), invented a solution (a mixture of ferric ammonium citrate and potassium ferricyanide, for you chemists out there).
A soaked and then dried piece of paper in this solution would become light-sensitive. When exposed to sunlight (aka UV), the chemicals in the solution react and create the color blue, and the unexposed areas would remain uncolored.
So if you place objects on this paper or, in general, cast shadows on it, leave it in the sun for a couple of minutes, and then wash it off, you would have a negative! This process of creating prints is called blueprint. Now it makes sense where the blue in blueprint comes from!
If you were an engineer or an architect when this was invented, you would be a big fan of it. Why? Couple reasons: you could make so many copies of your maps and drawings in a short amount of time, the scales would be the same as the original, it would be more accurate and cost less than hand-drawn copies, and on top of all that, you’d be sure no one could alter your drawings (unless they had a really good white pen I guess?! which I’m quite sure wasn’t even invented back then).
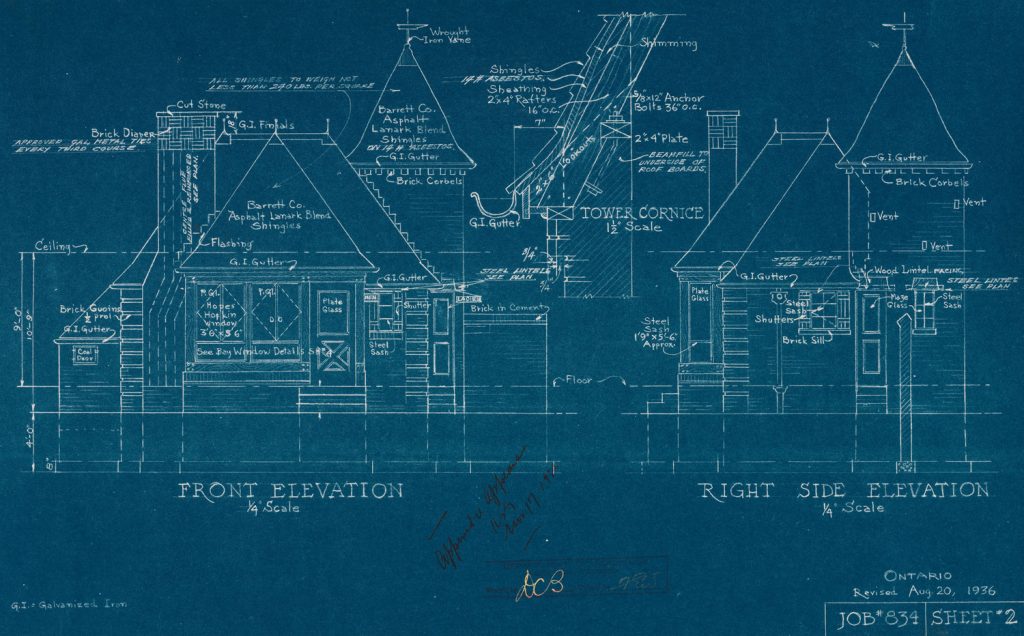
By Joy Oil Co Ltd – This image is available from the City of Toronto Archives, listed under the archival citation Series 410, File 505, Item 8. Joy Oil Co Ltd, Public domain, via Wikimedia Commons. https://commons.wikimedia.org/wiki/File:Joy_Oil_gas_station_blueprints.jpg
And now to answer what cyanotype is …….. drum roll please …… it’s the exact same process as blueprint!
In a photography context, people have used plants, different objects, and sometimes even their own bodies to create images using cyanotype. Another thing you can use is negatives/film negatives, to get a positive print.
So now that we all know what cyanotype is and how it works, let’s get into what I did for my project.
My Project!
The cyanotype kit we had gotten for our class project (from Opus Art Supplies downtown) contained fabric sheets instead of paper, which made it a thousand times more interesting to work with.
I was keen on using a negative image to make a positive print since I had only tried using different objects up until then. I eventually decided to print photos of me and my parents. I figured it would be my final project as well as a unique family photo.
I didn’t have any printed negatives or any transparents, so I decided to make them myself!
1. Creating a Negative
First, I used Photoshop to make our photos negative. Then, I laid a plastic zipper bag as flat as I could on top of my laptop and started coloring the white sections with a black sharpie. To be honest, I first started coloring the black sections with a sharpie and realized it had to be the other way around half way through!
2. Sun Exposure
The rest of the process from this point on seemed quite straightforward, but it didn’t go as smooth as I’d imagined. The key to getting a nice print is to expose the sheet to direct sunlight, and, well, we weren’t getting much of it that week in Victoria. The sun did eventually come out though! I ended up using all 10 sheets that I had left before I got the result I wanted!
As the sheet lays in the sun, it starts to turn into a dark bronze color depending on how long you leave in the sun. The longer you leave it, the darker the blue gets.
3. The Magic!
This is truly the most magical part of the process, when you get to wash the sheet and watch it as it turns into this beautiful blue color.
4. The Final Product
I ended up with dark to light blue variation which I really love. Since the marker didn’t cast as strong of a shadow, the marker strokes are quite visible in some areas, which I personally think makes this stand out compare to using a perfect negative image. My classmates seemed to like the imperfection as well 🙂
You don’t have to be an artist to try out cyanotype. It’s not all about the final result it’s the experience as well, and it was such a new and fun experience for me.
If you are thinking of trying it out, you should 100% go for it!
Hi, Lovely article. It’s nice to see that you do such creative work! I’m the editor of AlternativePhotography.com and we just love cyanotypes. 🙂 Keep up the good work!
Thank you so much!