
With UVic’s Return to Campus preparation well under way, the staff at the Computer Help Desk are asking ourselves questions that many other departments are probably pondering as well. What is it going to be like to be on campus full time again? What tasks need to be done before the start of the semester? How are our pets going to handle being home alone?
We don’t have answers to all those questions, but we have figured out a way to organize and manage the growing list of tasks that need to get completed before we fully return to campus.
Allison Edwards, Microsoft Planner extraordinaire and University Systems Technical Training Specialist, has created a Microsoft Planner, currently called Tasks by Planner and To do, in our Computer Help Desk team to manage, assign, and track our return-to-campus tasks. I asked Allison a few questions to get the scoop on how to use Planner effectively. If you’re interested in setting up your own Planner, please contact your Desktop Services Support (DSS) or the Computer Help Desk.
Kelly: What is Microsoft Planner / Tasks by Planner and To Do?
Allison: Planner is a really flexible tool that you can use to coordinate tasks with your team done. You can organize tasks in a visual way:
- assign tasks to individuals
- leave comments
- add attachments
- easily move things between categories
- add custom labels
- organize tasks in categories (Planner calls them buckets)
- and more!
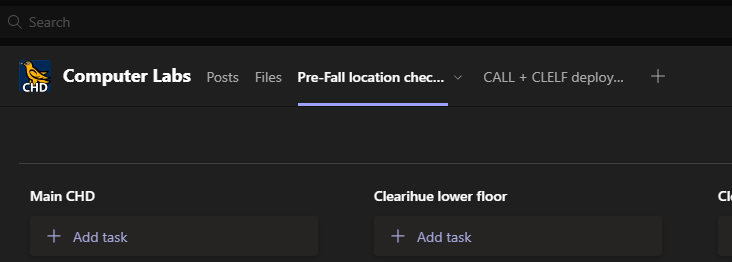
We have our checklist Planner linked directly into our Microsoft Team channel so our staff can find it easily and discuss any tasks in the chat. It also works on phones and tablets, which makes it easy for staff to use and update while moving between multiple locations.
Kelly: Why did you decide to use Planner?
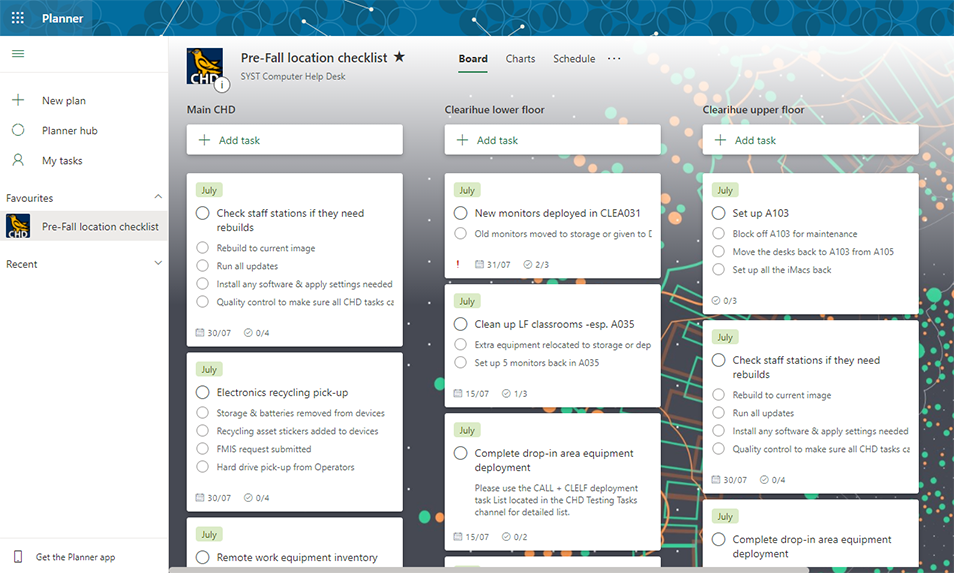
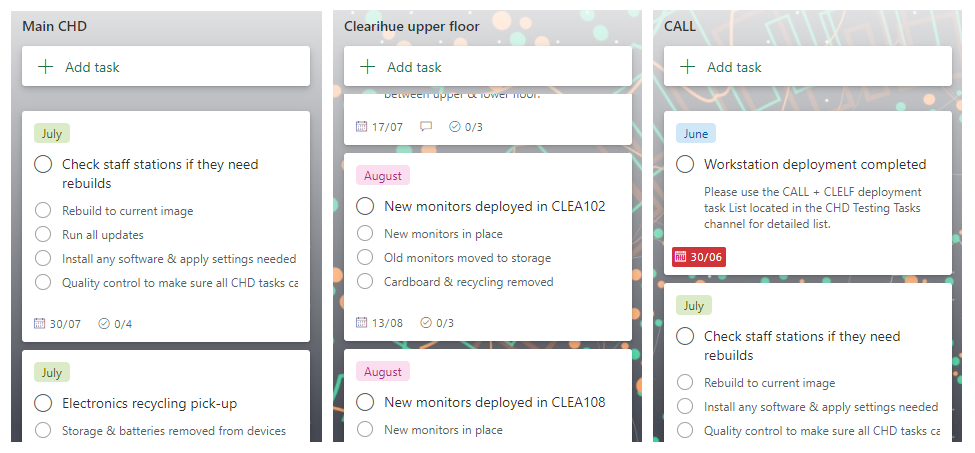
Allison: Our task list for preparing all the Computer Help Desk locations for the Fall term is extensive, to say the least. We have eight different locations in four different buildings – including 14 computer classrooms, 4 drop-in computer areas, and multiple service desks – some of which have had minimal staff presence since March 2020. Alongside our return to campus planning, we’re also working on our usual summer routine of upgrading classroom computers, launching new services, and catching up on maintenance. And we have a large staff to coordinate! To get everything done, I knew we needed to create a comprehensive plan to ensure our on-campus staff can work safely and nothing gets missed. Luckily M365 has given us a variety of new tools (like Teams, Tasks, and collaborative editing) and we’ve been exploring them over the last year.
I didn’t make the decision to use Planner all on my own! When I floated the idea of creating a pre-fall checklist one of our colleagues, Heather Gray, recommended Planner based on her experience using it for a detailed deployment project she’s been working on with several of our student staff. Planner has been really useful for smaller scale projects over the last year, so it was an easy decision.
Kelly: What is your favourite feature of Planner?
Allison: I have two favourite features!
I really like how easy it is to move tasks around between buckets or re-ordering their priority just by clicking and dragging. Sometimes timelines shift suddenly, or new things come up; it’s really easy to adjust your Planner without having to re-do anything.
My second favourite feature is the Microsoft Teams integration. It lets us keep the whole staff updated on upcoming tasks and makes the coordination of on-site staff in different facilities possible.
Kelly: What kind of tasks are included / examples?
Kelly: How do people know if they’ve been assigned a task?
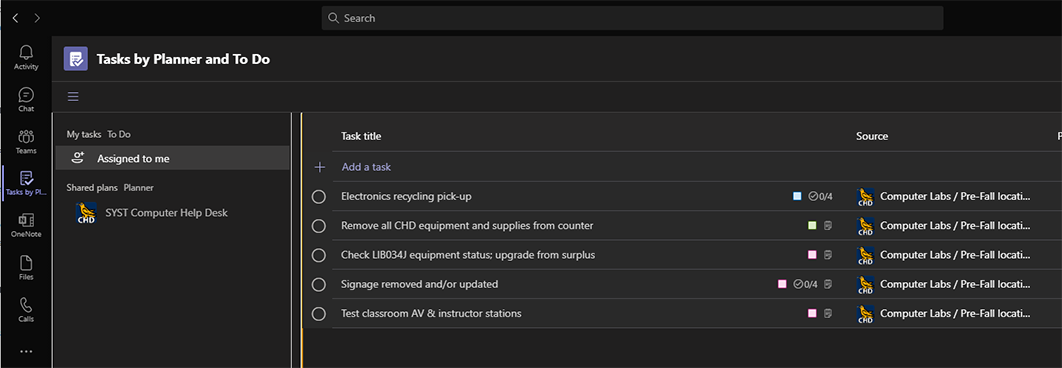
Allison: Depending on how you configure the notifications, you get an alert via email or on Microsoft Teams. You can check all of your assigned asks by looking at the Tasks by Planner app in Teams or the Planner hub in an Office.com browser session and see the priority, due date, and the source of the tasks (if you’re using multiple Planners).
We typically assign tasks to staff based on the weekly schedule. Because most of the Computer Help Desk is still working remotely, we’ll get in touch with folks before their shift to let them know that tasks are being assigned to them in case it requires some additional coordination.
Kelly: Is there a way to track which tasks have been completed?
Allison: There is! A Planner has three main sections:
- Board, which is where you create all your tasks and buckets. When you complete a task it moves to the bottom of the bucket.
- Charts, which gives you a visual overview of the status of all your tasks and priorities. You can see completion tracking here in a more visual way.
- Schedule, which is a calendar view of all the due dates. It also shows when things were completed.

Kelly: Is there anything else we should know about Planner?
Allison: It’s really customizable. You can change the background images, the colours of tasks, filter tasks a ton of different ways, change the layout and view, and many more options. We’ve just scratched the surface of using Planner for our team, and we’ll definitely keep using it in the future.
Thanks to Allison for answering all of our questions and for getting us organized as we plan our return-to-campus! If you are interested in setting up your own Planner, reach out to your Desktop Support Services (DSS) or the Computer Help Desk. Plan on!
-Kelly Diether, Learning Systems Technology Support Analyst