Hey, here’s me talking about something other than TED Talk Lunches! Yes, it’s true – I occasionally break free from watching videos at work.
This post is about creating those .ics calendar file attachments in such a way that people can “Accept” them, but don’t have to “Decline” them. This method works so that it gets added to their calendar, and you can track attendees for those who accept. This is how I send out invitations to our TED Talk Lunches: a regular ol’ email with all the info, and a calendar attachment with essentially the same info as the email.
“Why don’t I just plain old invite everyone to my event?” you ask.
Well… when I get an actual calendar invite to something, I need to respond to it or it’ll sit forever clogging up my calendar. If it’s an actual work request for me to attend a meeting or some such thing, then sure – I need to respond, and other people should be able to see that I was invited and whether or not I’ll be there. But if it’s a fun thing, like a TED Talk Lunch, OR you’re sending it to me in an email blast to a zillion people, then:
a) I’m kind of annoyed that I have to “Decline” your offer to have fun;
b) all those extra clicks you just made me do; and
c) do you really want 113 “Decline” notices in your inbox?
What to do:
Note: these instructions and screenshots are Outlook 2013. I expect you should be okay with any decently recent version of Outlook.
- Create your Calendar item in your own calendar.
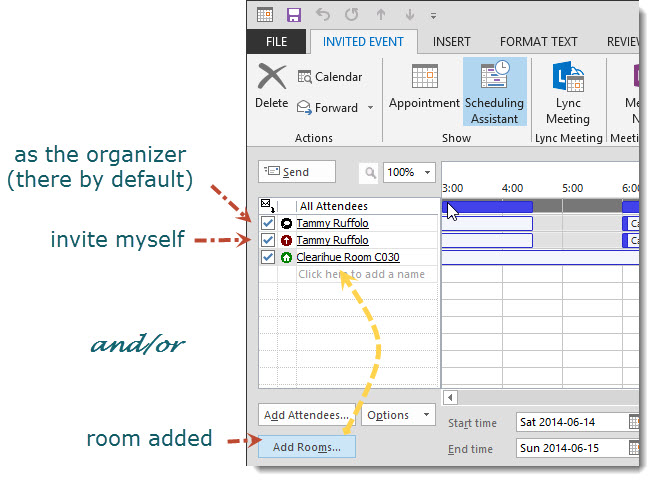
- Go to the Scheduling Assistant.
- You need to have at least one person or resource invited. That’s what makes this work! So:
- Add yourself in as an attendee (yes, you’ll be in there twice); and / or
- Select the room you’re going to book (eg. Clearihue CLE 030).

- Go back to the appointment and complete the body of the invitation.
- Send it.
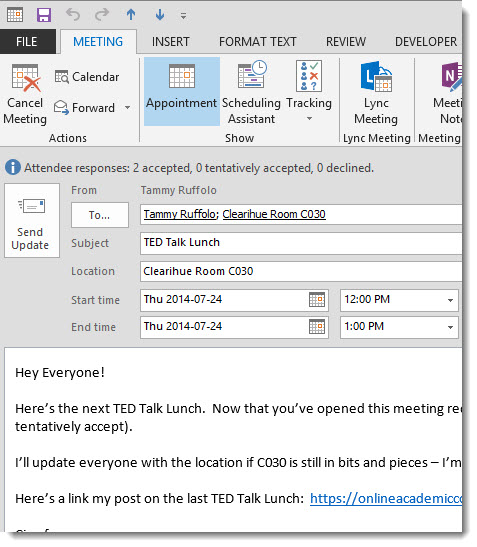
- Re-open it. Now it looks something like this: (note, you won’t see accept / decline, since you’re the organizer.)
- Click “File” > “Save As” and save the ics file on your desktop (or wherever you like! Why do instructions always say to save things to the desktop?).
- Give it a good name – your email recipients will see it. I name mine something like “Ted Talk Lunch 2014-07-24.ics” for clarity, and topic-then-date sorting. (Ha! See my other post on that topic: Sorting Tips and Tricks)
Okay! That’s it! Attach that .ics file to your actual email that you’re going to send out to the world.
Now go have fun 🙂
Edit 2015-03-27: As the meeting organizer, you won’t see an Accept option when you open the meeting request, even though you invited yourself. If you’d like to test your attachment, email it to a willing colleague to try out before you blast it out to everyone.
Thanks for the help, Tammy! On the Mac, I was able to drag and drop the event to the desktop in order to create the .ics file.