Recap
During my last progress report I talked about the inspiration behind my tablet weaving project and discussed the process of creating a warp and setting up to weave. Now I have had a chance to complete some weaving and I’m here to talk about it!
Getting Started
To start weaving I tied two knots in one end of my warp to provide myself with a sturdy loop I could wrap around a door or dresser handle to hold my project in place. I ended up primarily weaving off of a handle on my dining room table as I was then able to keep my weaving chart on the tabletop for easy access.
Starting the weave was more challenging than anticipated for a few reasons.
Firstly, I automatically noticed that the knot I had used to secure the warp was affecting the thickness of the fabric as the threads were being held together by the knot. Consequently, The fabric I was creating was narrow, thick, and stiff.
I also noticed that the pattern was not showing up as pictured. At first I figured that this was because of the issues caused by the knot so I continued weaving hoping the threads would begin to straighten themselves out.

Weaving
As I went on it became clear that I had a mistake in my warp as the pattern was still not clear.
I checked my threading time and time again making small changes here and there in hopes of fixing the problem but nothing seemed to work. That is until I finally realized my most crucial mistake. It seemed as though I had mixed up my s and z threading. That is the direction that the yarn is threaded into the tablets, as seen in the photo below.

Although I am sure I had originally threaded my warp correctly I think all the fiddling messed something up so I was forced to flip my cards. I also had a few cards that needed to be adjusted forwards or backwards to ensure I had proper threading. This is why, as you will see in my photos, the marks on my tablets do not match up entirely, as those are the cards that had to be shifted.

After all that hassle I thought I had fixed the problem and began weaving again. The width and texture was improving but my pattern still remained unclear. That is until I looked at the back. It wasn’t exactly my pattern but something was showing up and I could tell it was a start.

Realizing that for some reason my weaving was showing up on the bottom even though my cards were threaded properly I decided to try weaving in reverse, or at least moving my cards in the opposite direction of that instructed on my pattern.
It was surprisingly nerve wracking weaving without seeing what I was doing. Only hoping that it would work. But In the end I was pleasantly surprised. The pattern was there and it looked better than I could have imagined!
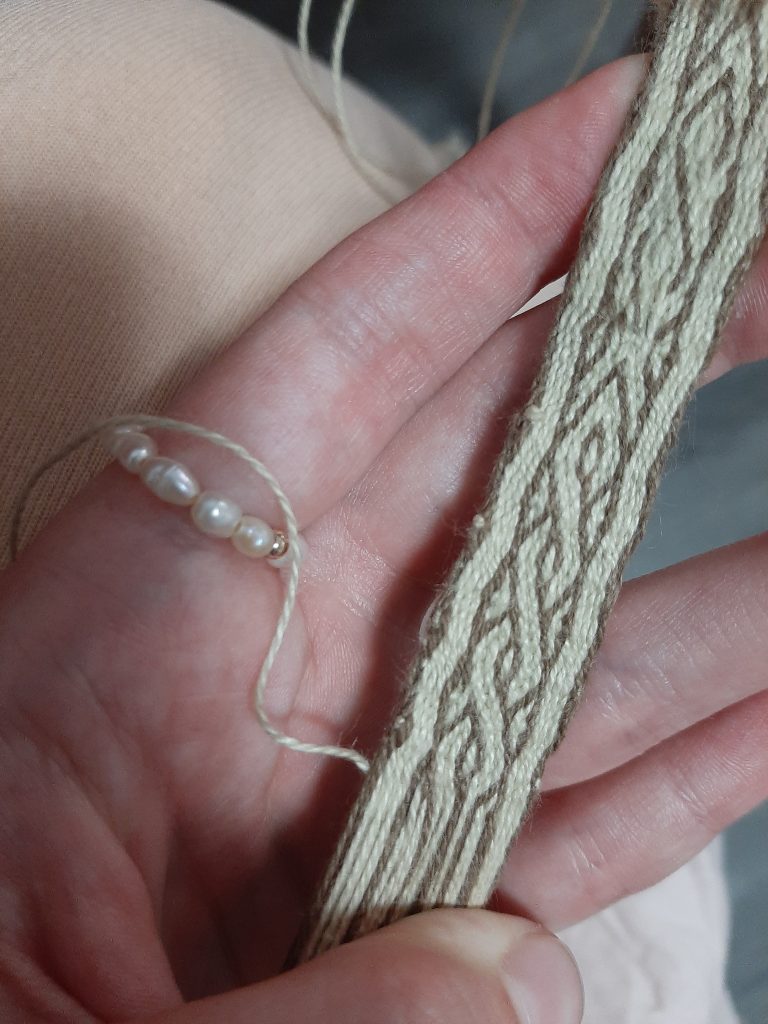
Conclusion
Since then I’ve continued my weaving. Although I’m still working upside down (I don’t want to chance it) the weave is only getting better and better. I’m getting faster too. At this point it takes me 40 minutes to an hour to complete the whole pattern repeat and It’s becoming easier to remember what steps come next. Although some days weaving is still frustrating, like when I forgot to add a thread or the tension is off, I am finding it more and more relaxing. I’ve been working on it so much I am almost out of warp!

Anyway, I can’t wait to see the final project so that I can reflect on what i’ve learnt.
Until next time,
Kierrah