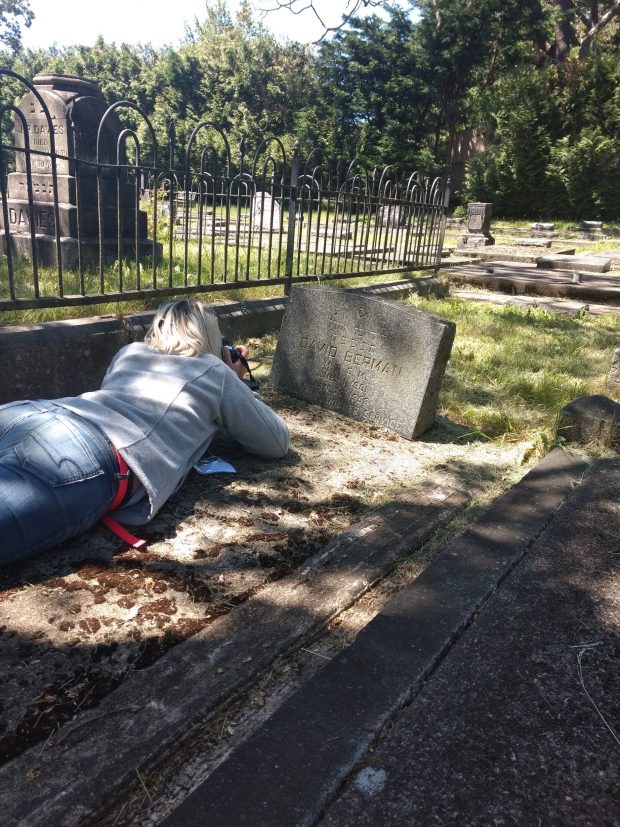
In this course we have learned a whole lot about recording cemeteries. One of the important procedures that goes hand in hand with gravestone recording is photography. Photographing monuments is essential because it provides a record of what the monument looks like.
In this article: Photography for Graveyard Recording, we are given a guide on how to properly photograph graves. The article discusses framing, lighting, and photo resolution.
In terms of framing it is important to centre the monument in the photograph and take the photo close enough to the monument itself so there is not too much of a distracting background.
Regarding lighting there are two factors the come into play: the position of the sun and the brightness. The position of the sun is important to think about because your shadow might be in the picture if it’s too sunny, or the inscription may be hard to read because the sun is behind the monument. As we learned in class, slightly overcast days are the best days for monument photography. The brightness pertains to how much light the camera is taking in, however that is not something we had to worry about when using the Auto setting on the DSLR cameras.
Lastly is photo resolution, which we did not discuss much in class because we are using cameras which already have a high resolution. This article is more directed at beginners and people who are photographing for their “Historic Graves Project.”
Although these theories provide us with some helpful instruction, on the ground monument photography proves more challenging than expected. Even armed with instructions on how monuments should be photographed, we still managed to capture our share of terrible photographs of beautiful monuments that really deserved better. Thus, the topic of this blog post:
Monument Photography: What Not to Do
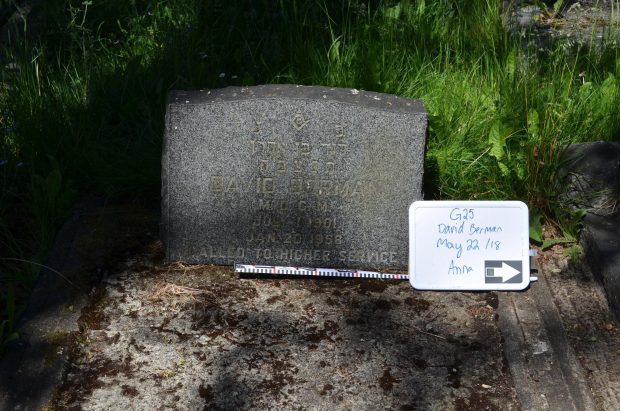
For comparison, here’s an example of good monument photography. This photo was taken by Anna, and checks all the boxes for what these photos should look like. The monument is centered and both the inscription and the whiteboard are easily legible and while there are some unavoidable shadows from the foliage, they don’t obscure any important details.
Now, the cautionary tale of how photography can go terribly wrong:
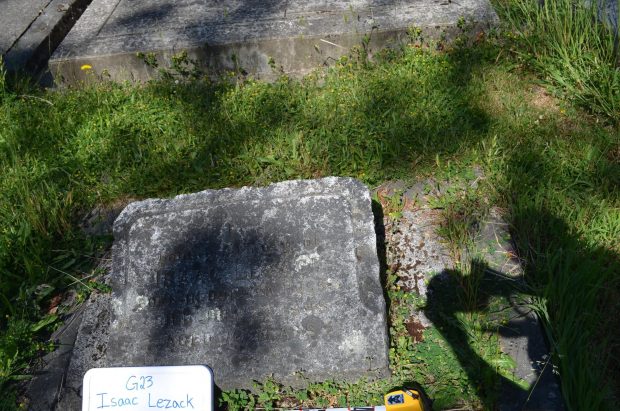
There’s a few things wrong with this image. First, my shadow is clearly visible in the image. One of the first things we were told about good monument photography was to keep your shadow, and therefore yourself, out of the photograph. So, naturally I tried to avoid this by doing a series of weird poses. This involved planting my feet, bending sideways at the waist at a 45 degree angle and stretching the camera away from my face in a vain attempt to minimize my shadow’s presence. I affectionately refer to this practice as monument yoga. This did not work in the slightest. Instead, I managed to compromise my ability to see through the camera, and therefore took a horribly off-centered photo. The monument is off to the side, the bottom half of the whiteboard is completely cut off, and the scale bar is pretty much gone.
Good weather makes for bad monument photography. While I hugely enjoyed the sunny weather and blazing heat, about one third of my photos were rendered unusable by the brightness and position of the sun which cast my shadow into the majority of the photos. This issue could have easily been resolved by displaying some patience, and waiting for the sun to be in a better position.
Altogether, the message here is that monument photography is more finicky in practice than in theory, and even the best photographers (which I am not) can be stymied by beautiful weather, bad angles, and worse timing. However, most of these issues can be solved with just the tiniest bit of patience and dedication.


