Brightspace offers instructors with different options regarding the grade system they would like to use for their courses. The two most common options are the Weighted and the Points grading systems. This post includes the steps involved in creating a weighted grading system in Brightspace.
Option 1 – Using the Gradebook Settings
- Click on Grades on your navbar, and then select Settings on the top-right corner.

Settings
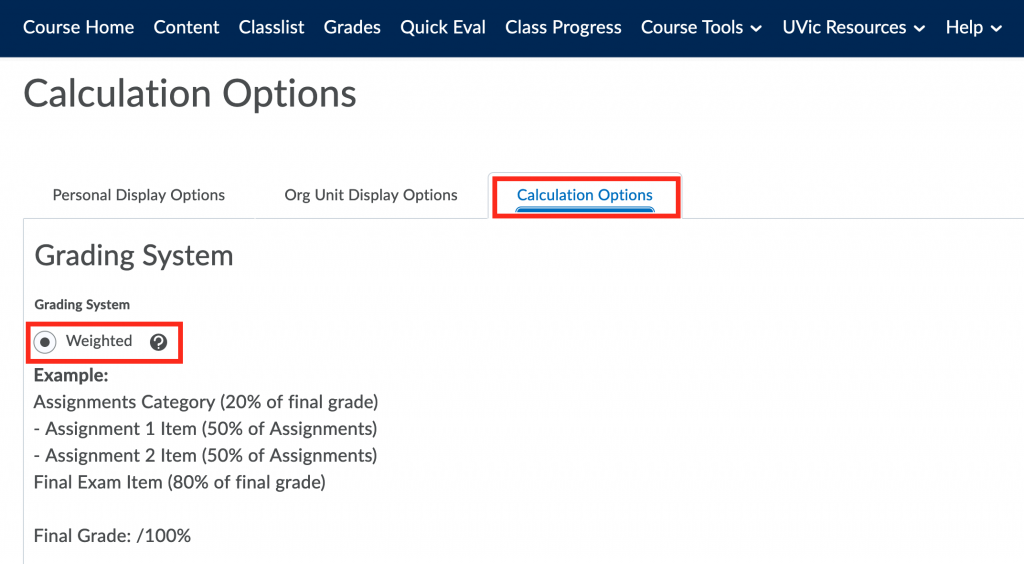
- Once the Settings tab opens, navigate to the Calculation Options tab and select the weighted system.
Calculation Options
Option 2 – Using the Setup Wizard
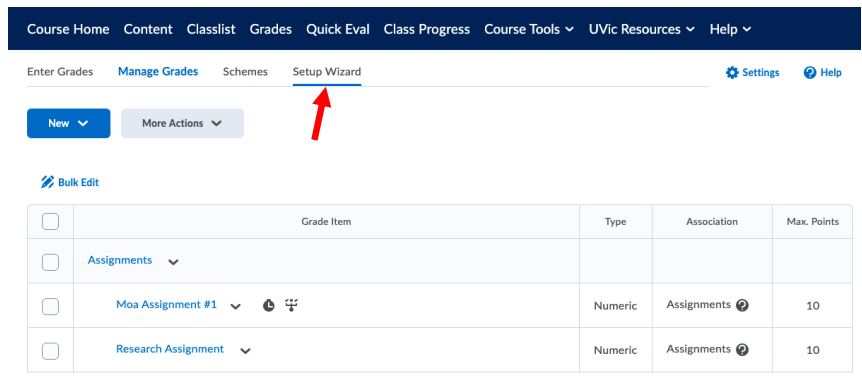
1. Navigate to Grades from the nav bar and click “Setup Wizard”.
Setup Wizard
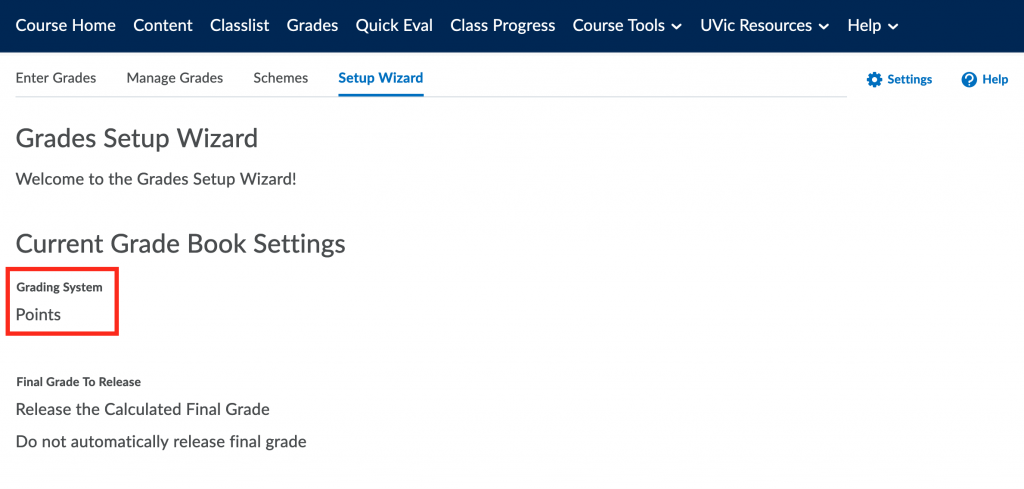
2. Check the current Grade system under “Current Grade Book Setting”. If it reads “Weighted”, then we already have a weighted system in place, and there is no need to follow the remaining steps. If it is any other system, such as “Points” shown below, scroll all the way down and click Start.
Start the Setup Wizard
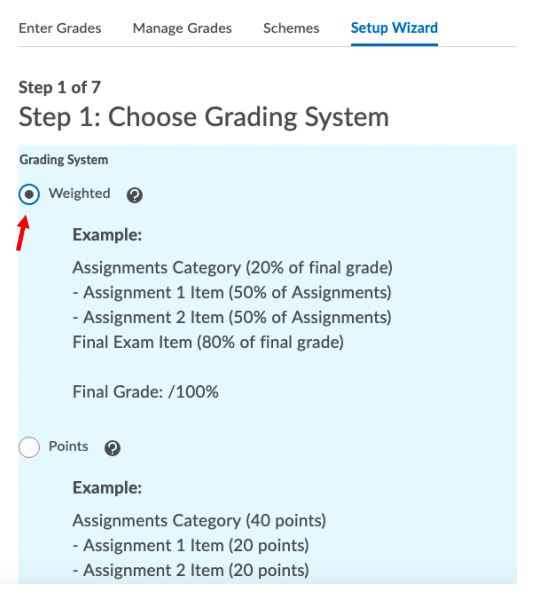
3. Choose the “Weighted” grading system as shown below.
Weighted System
NOTE: The remaining steps should be used as a guide. Please note that the choices you make in these steps may be different according to your course requirements.
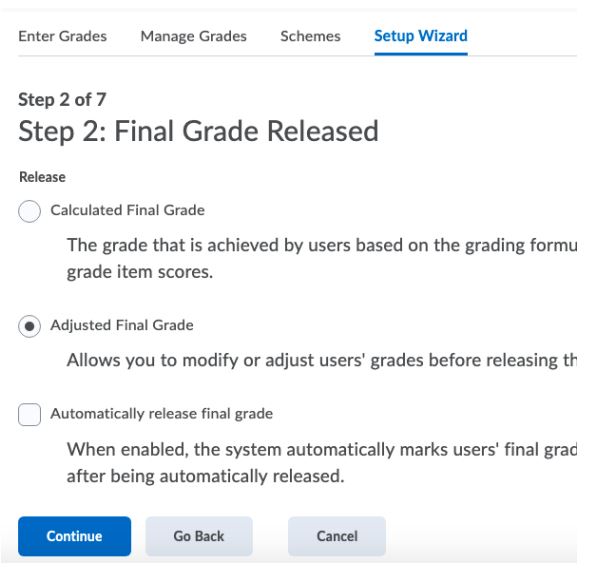
4. Select Calculated Final Grade to have the system calculate the final grade, or select Adjusted Final Grade to have the ability to modify the final grade after the system calculates it.
Select the Final Grade type
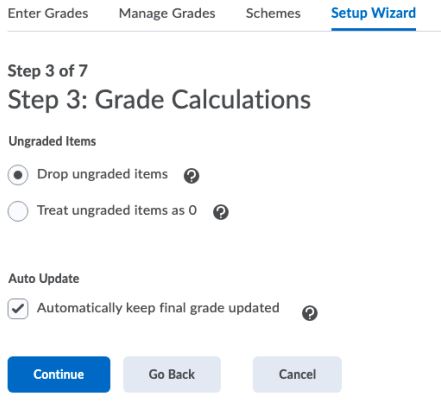
5. Select Treat ungraded Items as 0 to have ungraded items automatically set as 0, or Drop ungraded items for Brightspace not to consider ungraded items in the final grade calculation. Select Automatically keep final grades updated to have the final grade updated with each grading change.
Grade Calculations
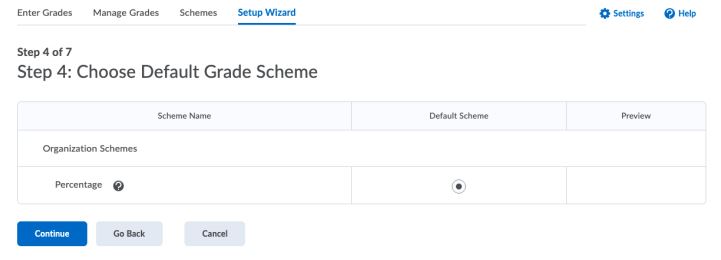
6. The Default Grade Scheme can only be modified in this step if an alternative grading scheme has been previously created. Click Continue.
Default Grade Scheme
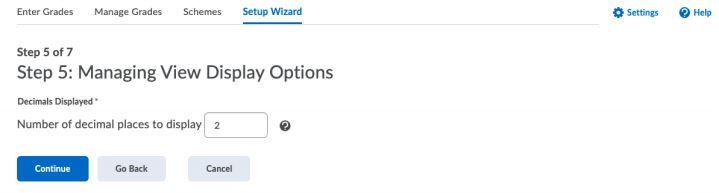
7. Enter the number of decimal places to display for the grades.
Decimal Places
8. Select how you would like grades to be shown to students.
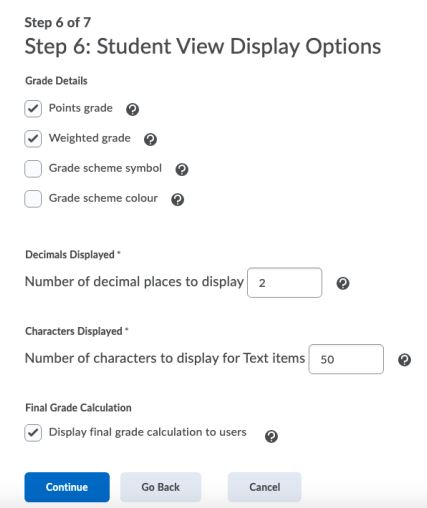
Student View
9. Click Finish to complete the Setup Wizard.
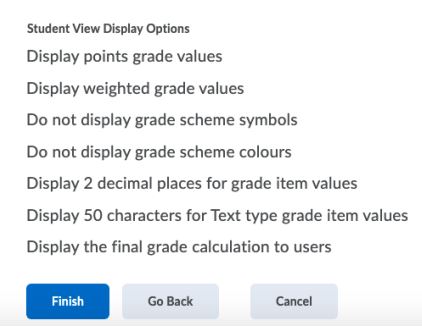
Finish the Setup Wizard
10. You can now create grade items and categories within the Weighted Grade system.

Add grade categories and items
11. You can create a new grade category by clicking New > Category, or edit an existing category by clicking the drop-down menu beside it.
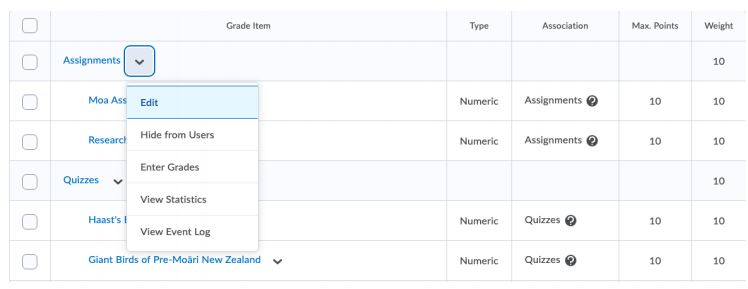
Edit a grade category
12. Enter a weight, and select a distribution type.
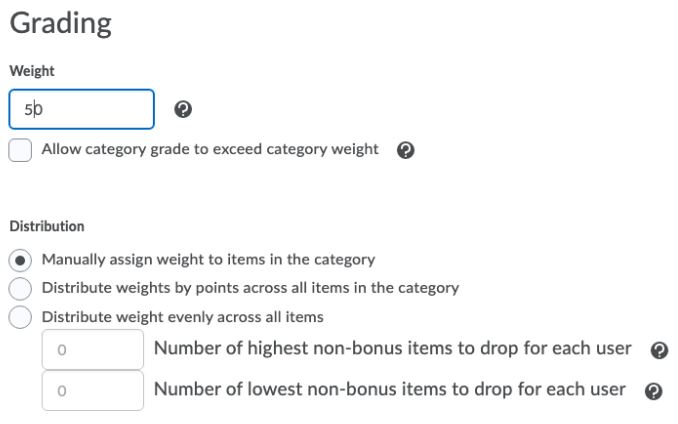
Weight and distribution
13. You can create a new grade item by clicking New > Item, or edit an existing item by clicking the drop-down beside it.
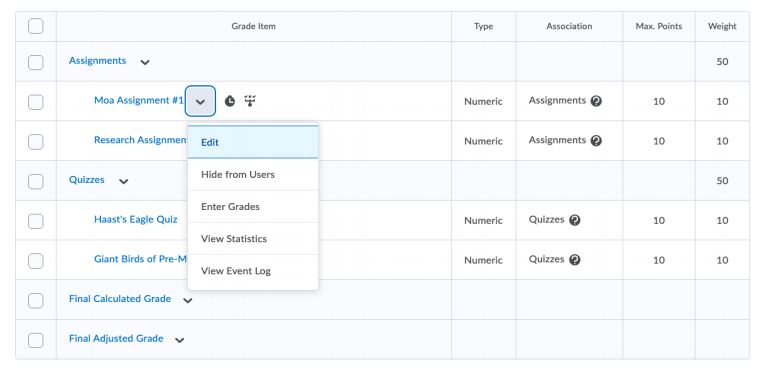
Edit a grade item
14. Enter the maximum points and weight for the item.
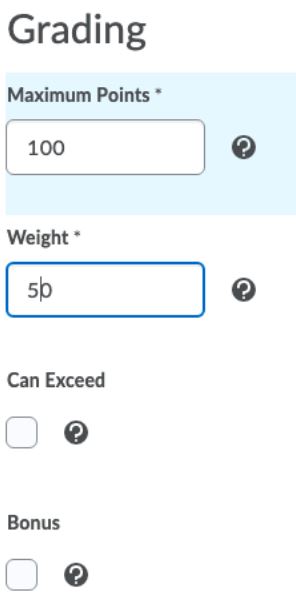
Maximum points and weight